

Tasks
Boards, Kanban and list, filters, assignments, comments and handing work to the agent – how to organize tasks in Clapilot.
Open in ClapilotTasks are your team's shared work queue. They are created by hand, from emails, from documents, from Team Chat or by the agent – and you can hand them to people or to the agent. All tasks are visible to the whole team unless a board is explicitly private.
The board
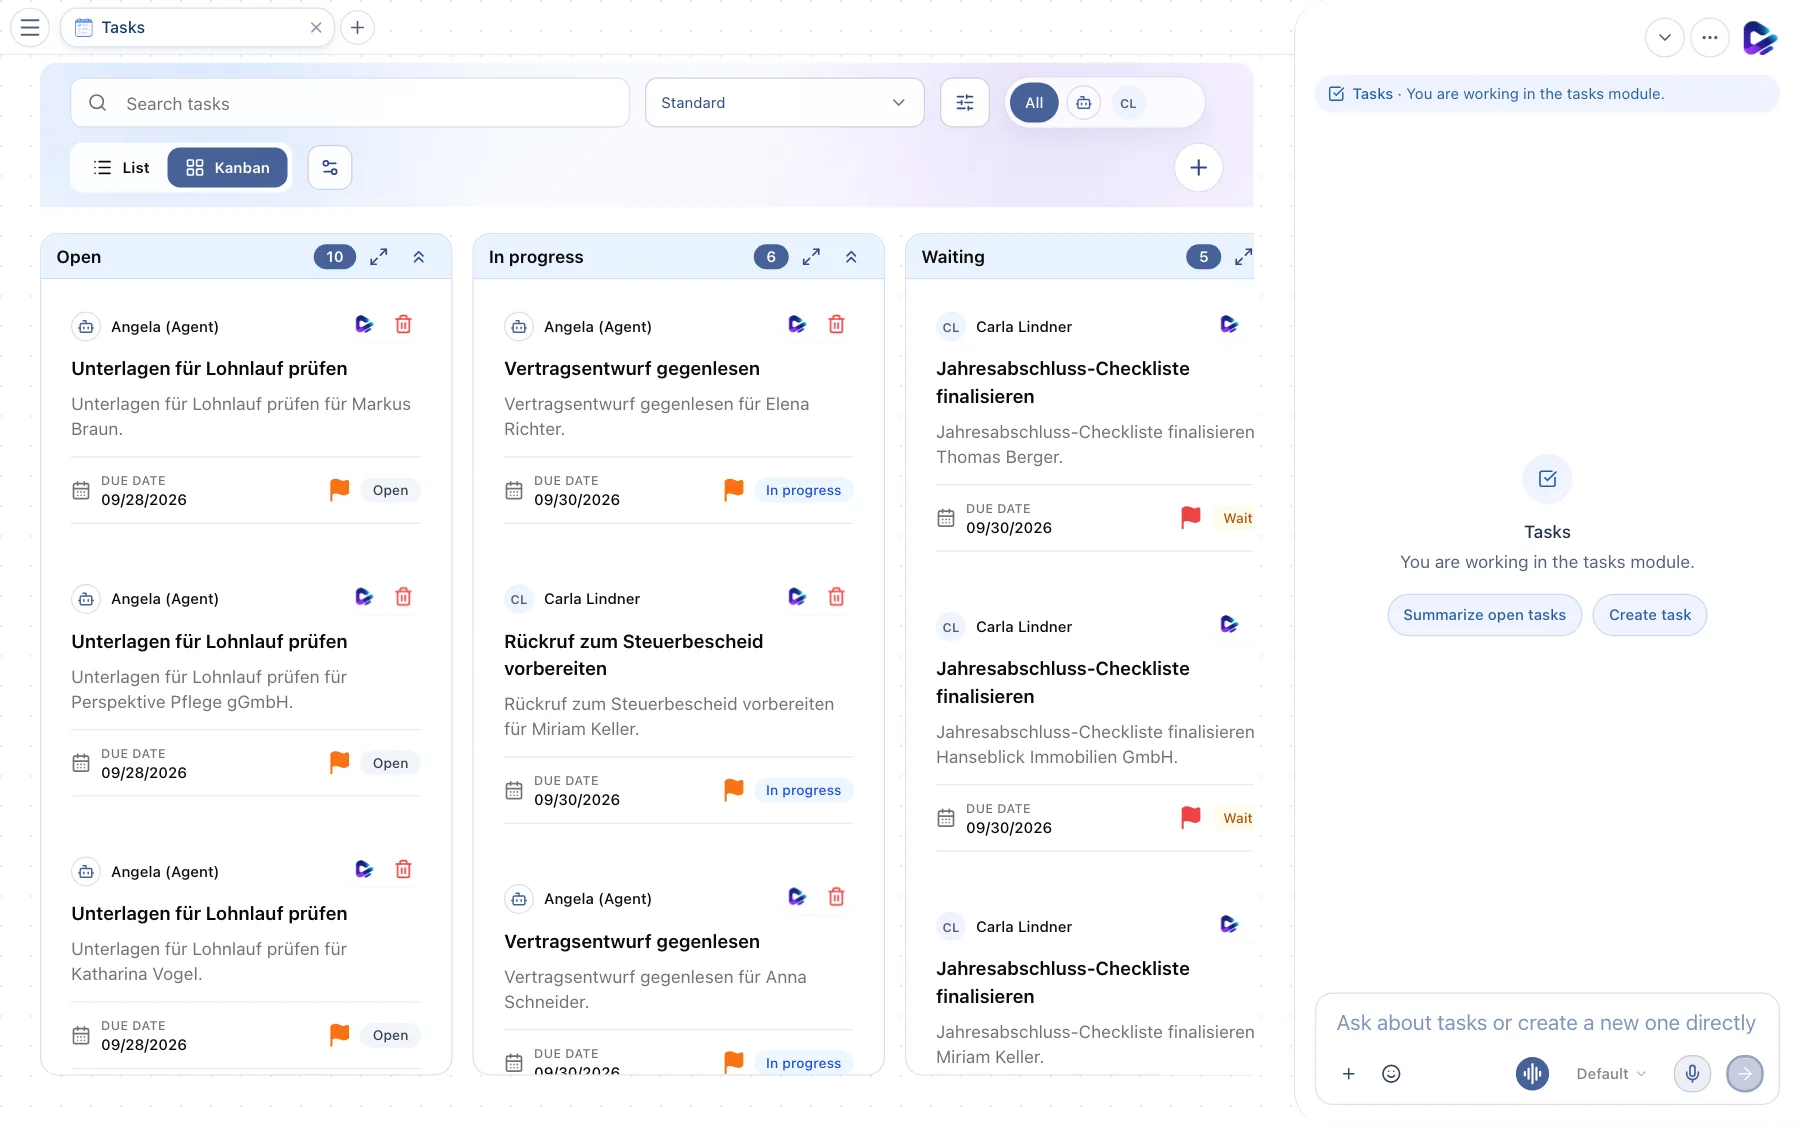
- Search tasks – searches titles and descriptions.
- Choose board – switches between boards or shows All boards. This is also where you create new boards – empty or from a template – and manage existing ones. The eye icon next to a board hides it for you (for example boards used by agents or automations); the eye icon next to Choose board shows hidden boards again.
- Filters – by status, priority, due date, assignee, follow-up, revenue and tag.
- Assignee – All or an avatar shows only the tasks of that person or of the agent.
- List / Kanban – switches the view.
- Configure board – add, rename, reorder or delete status columns. System statuses such as Open and Done are always kept.
- New task – opens the dialog for creating a task.
- Status column – with the number of tasks in it. Drag a card to another column to change its status.
- Collapse column – collapses or expands a column; the icon next to it focuses a column and shows only that one.
Each card shows who the task is assigned to, the title, a short description, the due date, the priority (flag) and the status. Right-click a card to open Quick actions: Assign to, Move to and Set priority.
The list view
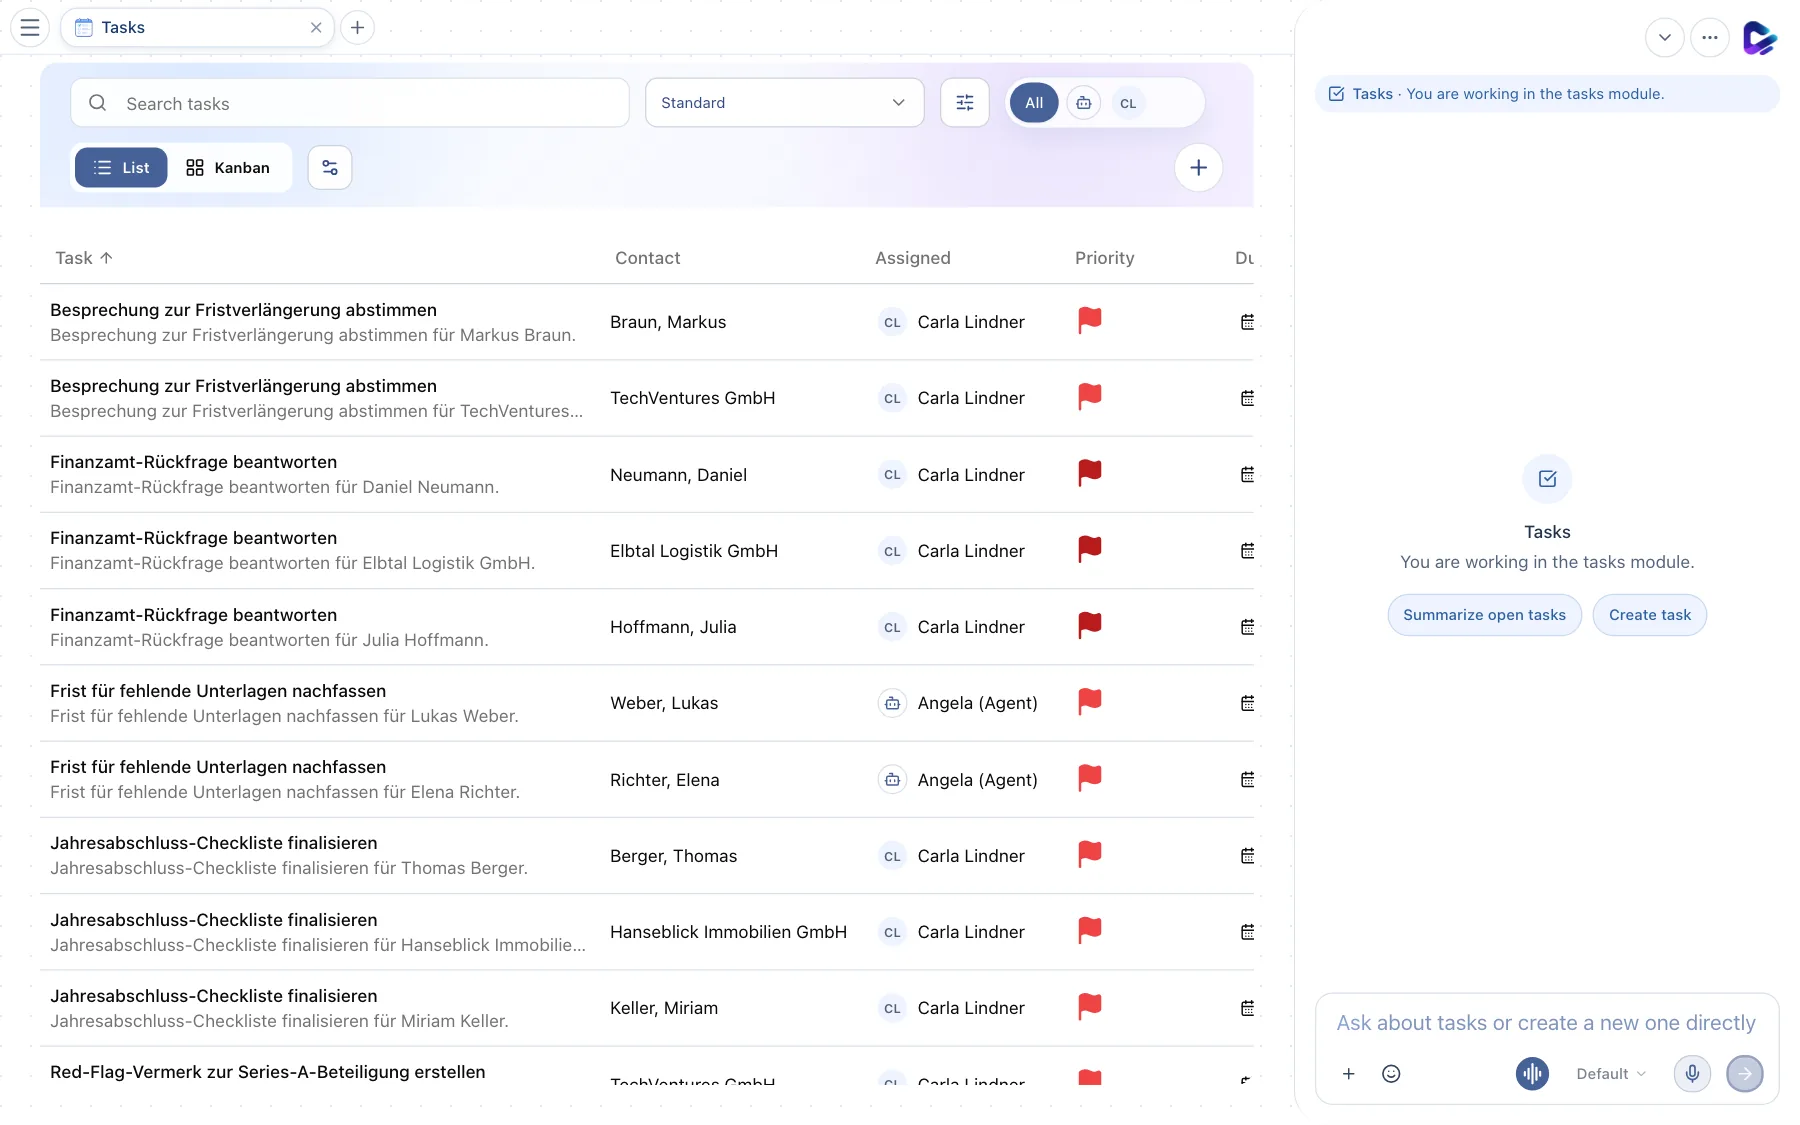
- List – switches to the table view.
- Column headers – Task, Contact, Assigned, Priority, Due and Status. Click one to sort by that column.
Click a row to open the task; when a row has focus, Enter opens it in full view.
Creating a task
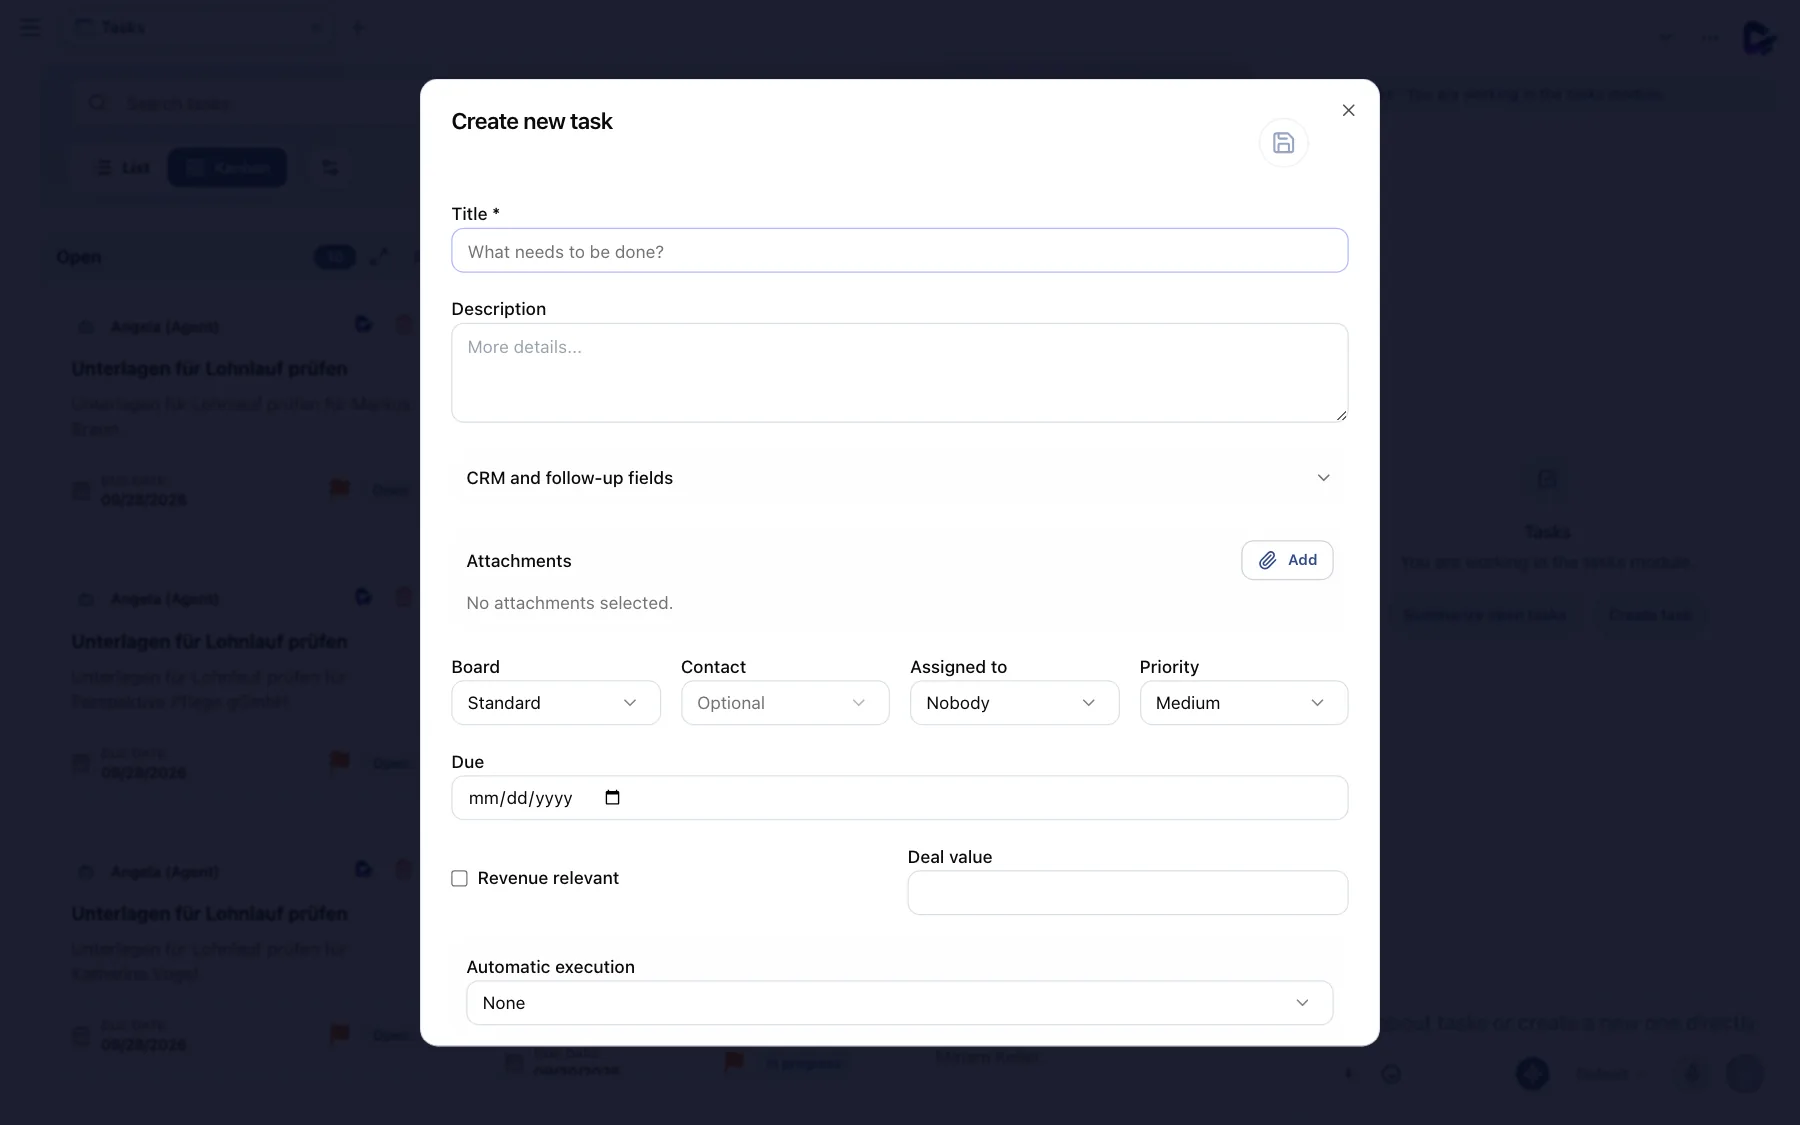
- Title – the only required field.
- Attachments – attach files directly to the task.
- Board – which board the task goes to. Next to it, you choose the Contact it belongs to.
- Assigned to – a person or the agent. To the right, you set the Priority: Low, Medium, High or Urgent.
- Due – the due date.
- Automatic execution – lets the agent work on the task by itself: once, at an interval or on specific weekdays at a set time.
Under CRM and follow-up fields you find extra fields for sales and account management work, such as follow-up date, deal value and Revenue relevant.
It's faster in the chat: “Create a task: request documents from Perspektive Pflege, due Friday, priority high, assigned to Mira.”
Opening and editing a task
Click a card to open the task.
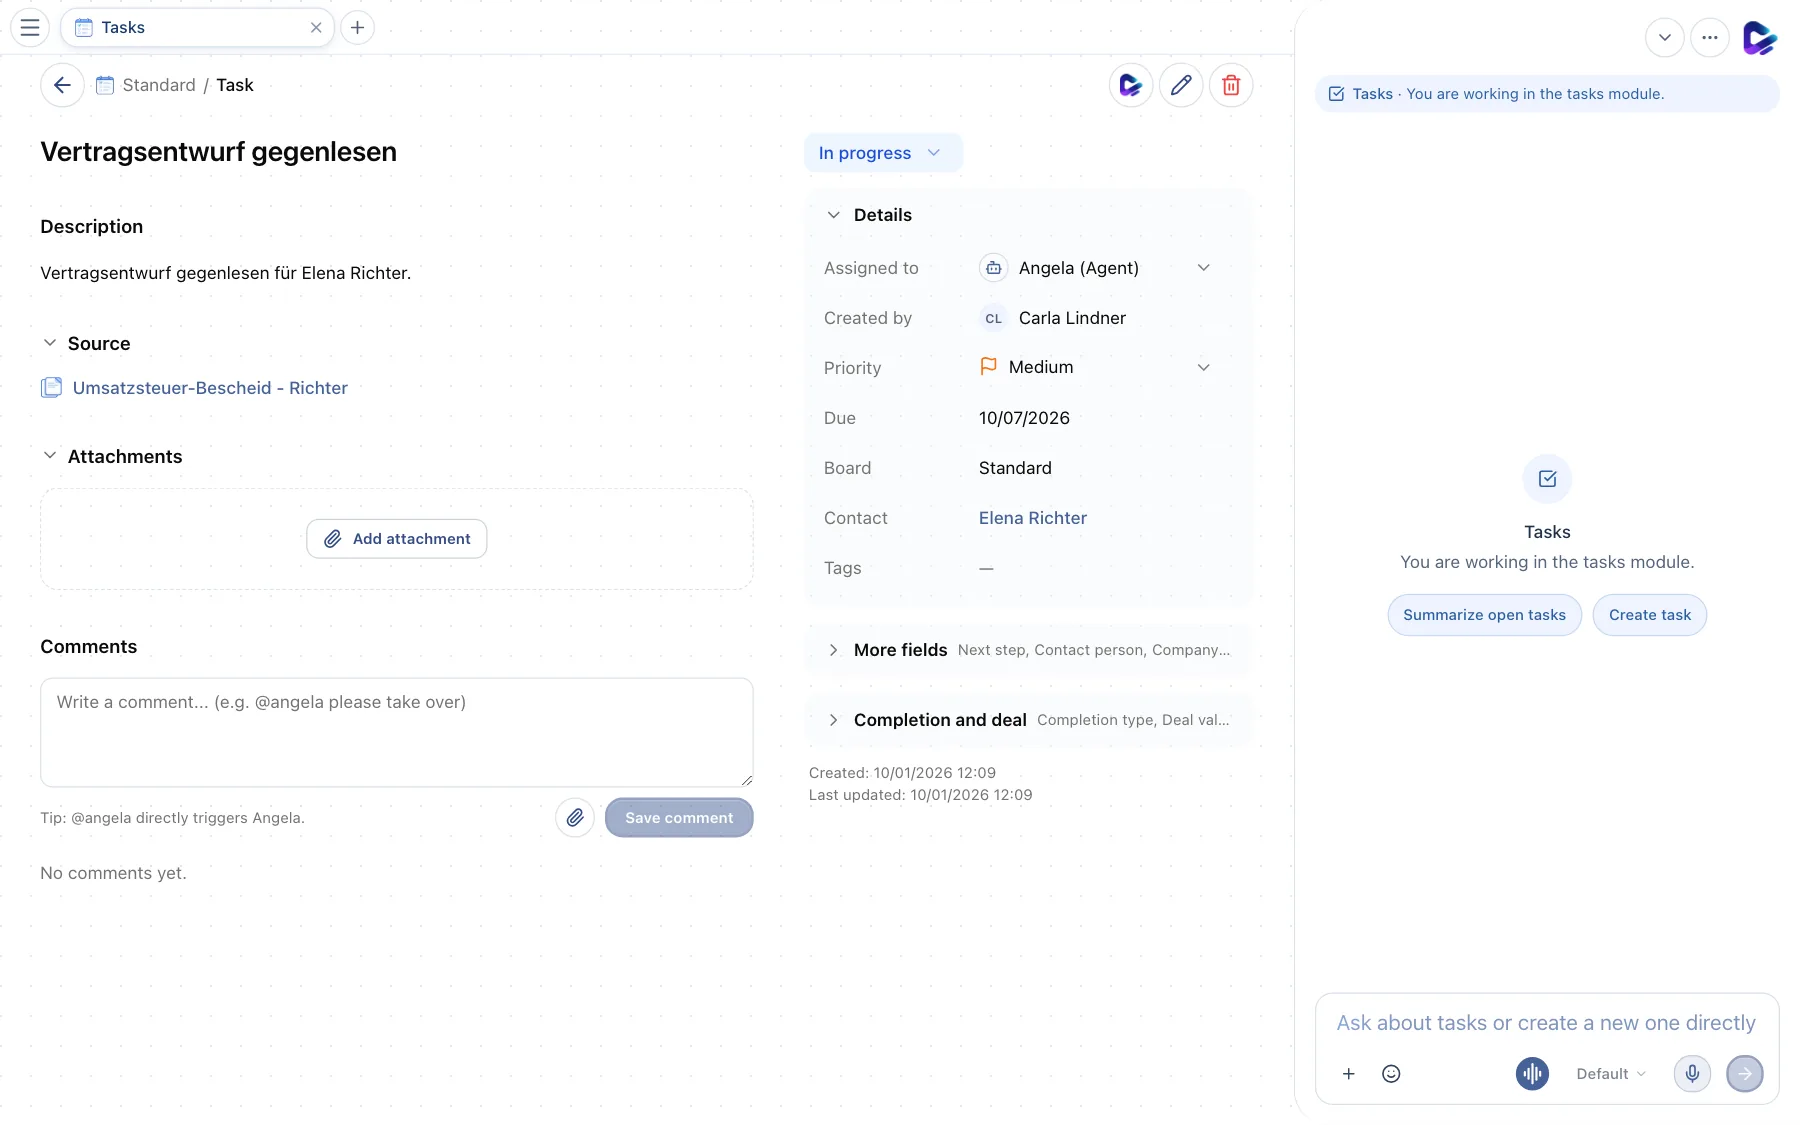
- Back – returns to the board (or press Esc).
- Delegate to Angela – hands the task to the agent, which works on it and records the result in the comments. Next to it, you edit the task (pencil) or delete it.
- Source – where the task came from: Email, Document, Team Chat, Issue Reporter or Created manually, with a summary.
- Status – click to open the status list; the change is saved immediately.
- Details – assignee, creator, priority, due date, board, contact and tags. You can change Assigned to and Priority right here without entering edit mode. Click the contact to open their case.
The view is laid out like a ticket: title, description, attachments and comments on the left, fields on the right. Below them you can expand More fields (CRM and follow-up fields) and Completion and deal. Add attachments at any time with Add attachment or by drag and drop. In a narrow window the sidebar moves below the content.
Comments and mentions
At the bottom of the task, you discuss it with your team. If you mention the agent, it does what you ask and replies in the same thread.
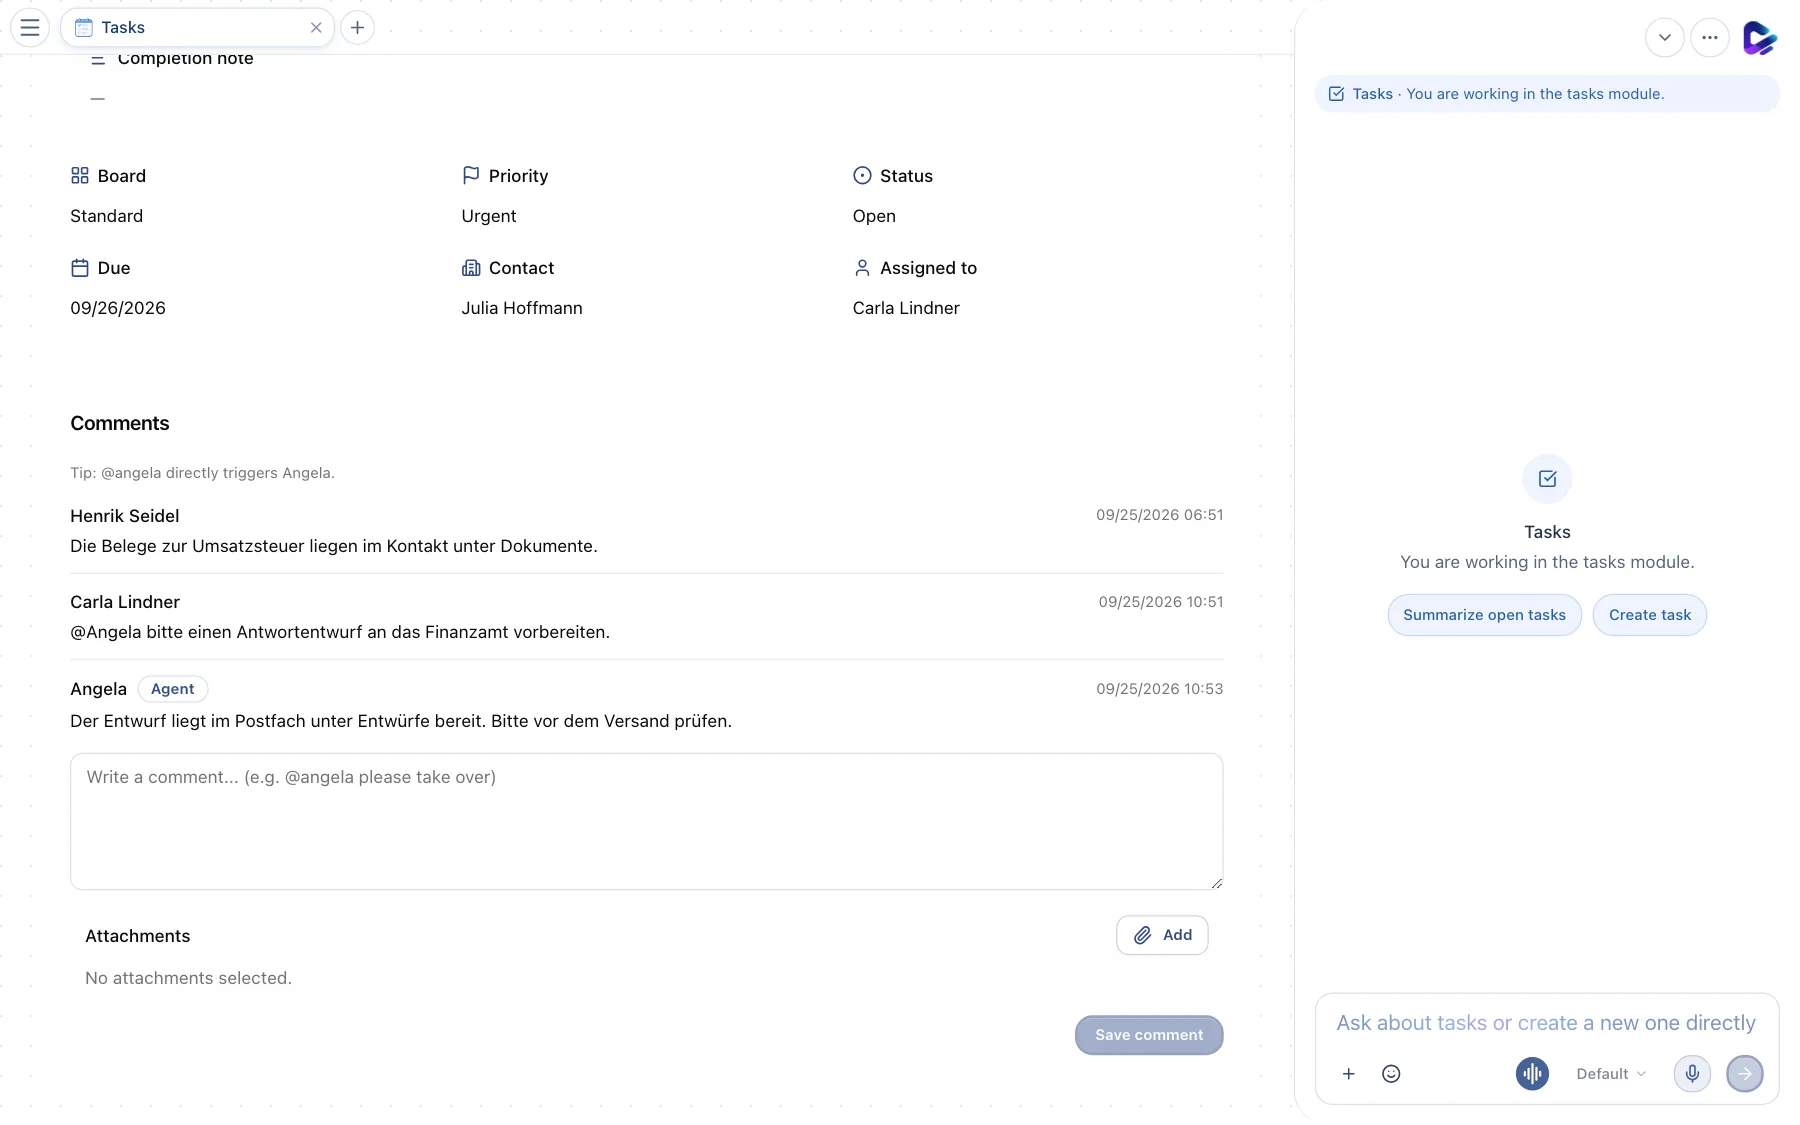
- Comments – the thread with comments from colleagues and the agent.
- Mention – with
@angelayou give the agent a job directly from the task. Its reply is labeled Agent.
The flow view
Next to List and Kanban, Flow draws a diagram like the automation editor: every incoming email and document on the left, the tasks created from it in the middle, and their status on the right (open, in progress, waiting, done). When a document produced several tasks, lines lead to all of them. Done tasks only appear when they were completed in the last 7 days. Use the status buttons above the diagram (or click a status) to see only that status; click a task to open it, or an email or document to open the source. Turn on Manual tasks to include tasks created by hand.
Approve next steps
The Intake agent proposes one to three concrete next steps for open tasks, the recommended one first. You find them in the dashboard widget Proposals to approve and in the flow view under Next steps. Pick an option and tap Approve: the task is closed and the agent carries out the step, for example a prepared draft. Deny closes the task without further action. If a task has no proposal yet, get one with Request proposal.
The Inbox: tasks from emails and documents
Tasks that Clapilot creates from incoming emails and documents land on the Eingang board: tasks from your personal mailbox on your private Eingang board, tasks from the agent mailbox and from documents on the shared one. The Intake agent takes care of them: it reads the email or document, prepares a reply as a draft, adds appointments, and messages you in the Inbox chat when it needs your approval or some information. Just answer there, for example "1 is fine, send it". It sends nothing without your yes. It reminds you of open tasks after 24 hours, 48 hours and then every three days, never at night. If you don't want that, switch the Intake agent off under Agents.
Bringing tasks over from Outlook
If you use Outlook for Mac without a Microsoft 365 connection, export an archive in Outlook (File → Export, file ending .olm) and upload it under Settings → Modules → Import. The preview shows how many tasks are open and completed and which categories exist. You choose the target board (or one board per Outlook folder), whether completed tasks come along, and which categories become tags. Title, note, due date, priority and status are imported; start date and reminder are added at the end of the description. Importing the same file again creates no duplicate tasks.
What you can ask the agent
- “Show overdue tasks.”
- “Which tasks does Mira have open this week?”
- “Move all tasks for Elbtal Logistik to next Monday.”
- “Create a task for every email with a deadline this week.”
Delete boards with the agent
For example, ask: “Delete the empty BM boards.” The agent identifies the matching boards and uses the normal deletion path with approval and audit logging. If a board contains tasks, explicitly choose a destination board to preserve them. Forced task deletion is not supported. Standard and active agent boards are protected; only the owner can delete private boards. Repeated requests report boards that were already deleted.